 1) Swooshy Letters: Students should read through this page and watch the video demonstration.
 Then students should draw their assignment on a nice sheet of paper using markers or crayons, take a photo of it, and email the photo to Mr. Kulzer (gkulzer@htwinsted.org) Be sure to show some background that proves it's your work. (Maybe your hand in it or a selfie of you holding your assignment.) Due 3/28

Students should download and print this hand-out with a jar already drawn on it. (or draw your own jar.) Each student is to come up with their own monster and draw it inside the jar. Color should be added with whatever materials that are available.
Monster Tutorial Video -- Non-Youtube Tutorial -- Student example
Take a photo of your drawing, and email the photo to Mr. Kulzer (gkulzer@htwinsted.org) Be sure to show some background that proves it's your work. (Maybe your hand in it or a selfie of you holding your assignment.) Due 4/3
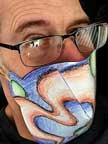
 3) Personal Protective Equipment (PPE) Mask [COVID-19 Mask): Let's have fun with this and use your creativity to make a protective mask. (Remember this will not actually protect you from a virus.)
Students can use any materials they have on hand to make a mask.
Or they can download and print a generic mask hand-out, design, color and cut it out.
*Idea from the best art teacher in the world, Charles Banks.
Take a selfie of you wearing your mask, and email the photo to Mr. Kulzer (gkulzer@htwinsted.org) Due 4/7

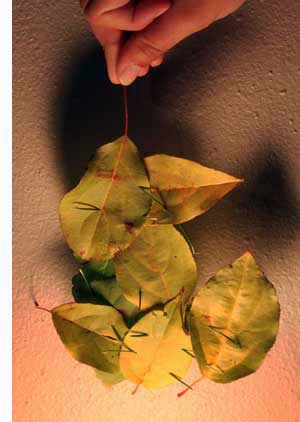
4) Andy Goldsworthy inspired artwork: Easter brings the first signs of new life. Spring is a great time to get outside and make things. Students should study Andy Goldsworthy's artwork then go outside and create their own version of a piece inspired by Mr. Goldsworthy's artwork.
A gallery of student "Goldsworhty" art can be found here.
This lesson may be repeated in different seasons to utilize the natural materials unique to each season: Snow and ice in the winter, colored leaves in the fall, greenery and flowers in the spring or summer.

Take a picture, and email the photo to Mr. Kulzer (gkulzer@htwinsted.org) Due 4/17

5) Crayon Layering: Normally I'd demonstrate how layering crayons can make shapes look three dimensional (like these -- Or -- this student example done by Clare) in class while students follow along doing it on their paper.
Because we're not in class, I made a video that explains the process. You can see it here on youtube. -- OR -- download it here.
Students should use crayons or colored pencils to draw and shade 4 shapes:
Be sure to leave a lighter color on the inside of the shapes while making it fade into darker color on the outside. If one doesn't turn out, try again. If you don't have crayons, you can do the same thing using colored pencils. If you don't have either of them, contact me and we will work out an alternate project.
Take a picture of all 4 (or one picture of each), and email the photo(s) to Mr. Kulzer (gkulzer@htwinsted.org)
Due 4/24

6) Cross Section Hidden Pictures Drawing: Students are to imagine an object cut in half and draw what would be seen inside... But be creative. Then, on one side of the paper place a "hidden pictures key" where you duplicate at least 5 things in your drawing that people can look for.
Student example here. Another here.
In class a short cartooning lesson would be given (similar to this one -- Youtube version here) before we start the project, so students can see how easy they can create crazy cartoon characters that might fit into their cross section drawing.
Fill the paper with lots of things so that it's difficult to find the hidden pictures in your drawing. Here's a professional hidden pictures example (but this is not a cross section. Yours needs to be a cross section).
Take a picture of your drawing, and email the photo to Mr. Kulzer (gkulzer@htwinsted.org)
Due 4/30

7) Show Me, Tell Me: Imagine yourself in class. Mr. Kulzer gives you a project where you can do anything you want. What would you do?
Students should either write a paragraph describing what you wish you could do in Art class OR draw/paint/sculpt something showing me what you would do.
Paste your paragraph into an email, or email a picture of your artwork to Mr. Kulzer (gkulzer@htwinsted.org)
Due 5/8

8) Realistic Eye: This lesson is usually taught in Drawing class but my 4th graders tried it last year and they did such a good job. I'm curious how my 7th and 8th graders will do.
Watch this video (on youtube here -- Or -- download it here) and follow along as I show you how to draw an eye. Pause the video periodically as you work through your drawing.
I can't wait to see how GREAT your eye drawings are! Email a picture of your Eye Drawing to Mr. Kulzer (gkulzer@htwinsted.org)
Due 5/15

9) Final Project: One of two things can be done for this project:
Youtube version of my "Making a Scene" vid here
Downloadable version of my "Making a Scene" vid
The "DVD Extra" bloopers that were cut from the above video just for fun.
Downloadable version of the bloopers
Remember that this is the final project and you should make it be your best project! Take some time on it. We'd have about 3-4 hours to work on it in class so consider putting in more time on this than any other project.
Email me (gkulzer@htwinsted.org) with a picture of your artwork, or your short video.
Due 5/21

10) Extra Credit: One of three things can be done for this project:
Youtube version of my vid here
Downloadable version of my vid
7th ad 8th graders who do this project will get 5 extra credit points.
ALL PROJECTS MUST BE TURNED IN BY THE END OF THE SCHOOL YEAR, 5/21/2020 OR THEY WILL BE COUNTED AS ZERO. NO INCOMPLETES WILL BE GIVEN.
Due 5/21


