
This assignment allows students to practice real-world applications for their work made with Illustrator and Photoshop. Their illustrations for this project will be turned into stickers using our
Roland TrueVis SG-300 Large Format Printer/Cutter.
Students should download the
Roland VersaWorks swatches to their computer prior to starting this project, then
follow the directions to install the Roland swatches into Illustrator's swatch library.
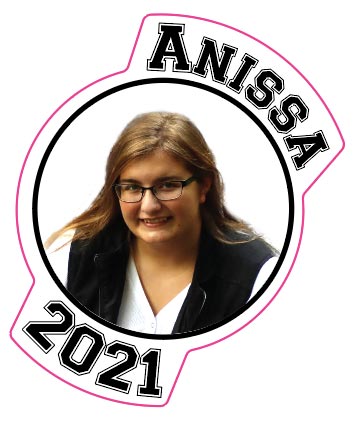
Putting to use skills learned from earlier lessons, students are to make illustrations or COB photos that they might like to make into stickers.
Two separate sticker graphics are required. Many more can be made to fill the allotted space, or these two can be copied and pasted multiple times.
Basic Instructions:
1. Create your graphics and/or cob your photos and save them as Illustrator or Photoshop files.
2. Make a new illustrator file 14.5 inches wide by 3 inches tall.
3. Open each file in illustrator by clicking "File" in the menu bar and selecting "Open" -then navigate to where you saved your files, select the file you want opened and click the "Open" button.
4. When the file is open in Illustrator, if it was a Photo or photoshop file, rasterize it (Object > Rasterize) then make a line around it to be used as a cut line. Keep it at least 5-10 pixels away from the image. (Video tutorial for Cut lines around a photo and video tutorial for Cut lines around an illustration
5. Select the cut line and apply the Roland "CutContour" swatch to it. (Select the line and click on the "CutContour" swatch in the "Roland VersaWorks Swatches" panel. Your cut line should turn pink.)
6. Group your design and the cut line, copy it and paste it into the 14.5 X 3 Illustrator file you created previously.
7. Repeat for your second design (and other designs you'd like to include on this print).
8. Arrange your designs to fill the 14.5X3-inch space so that you can easily cut them apart while still minimizing sticker waste.
9. Save the 14.5X3 illustration as an Illustrator EPS (Encapsulated Post Sript) file. * *If you see a dialog box (like this) pop-up talking about spot-colors, some graphics or images need to be rasterized before saving. To rasterize, select the image(s) in your document, click on "Object" in the menu bar and click "Rasterize". Then try saving again. (See screen shot here.) DO NOT RASTERIZE CUTLINES!
If students
follow directions and achieve an 8/10 or higher, they will be able to print their designs on our Big Roland.
Evaluation:
2 points -- Complexity/Quality of both designs
3 points -- All cut lines are properly made
3 points -- Good use of sticker space. (Not alot of blank or wasted material)
2 points -- Saved as Illustrator EPS file with your name
10 Points Total
Local vids in code
--
--