
First Computer Animation
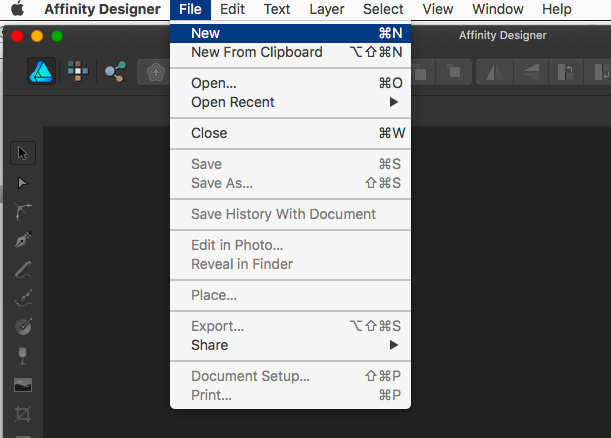
Creating a series of images to animate basic movement.1. Open Affinity Designer from the Doc or from the Applications folder.

2. Under "File", select "New".
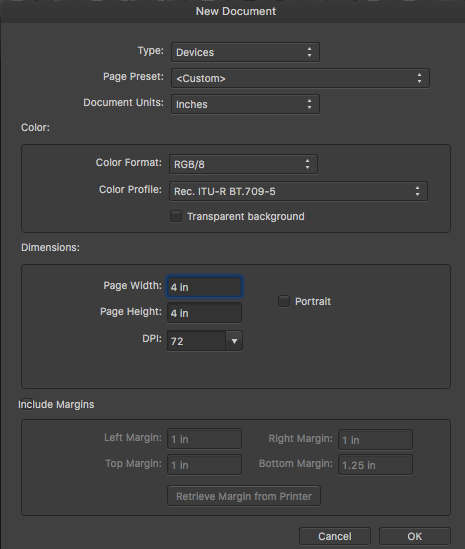
3. When the "New Document" box pops up, put in settings similar to those shown below and click "Ok".
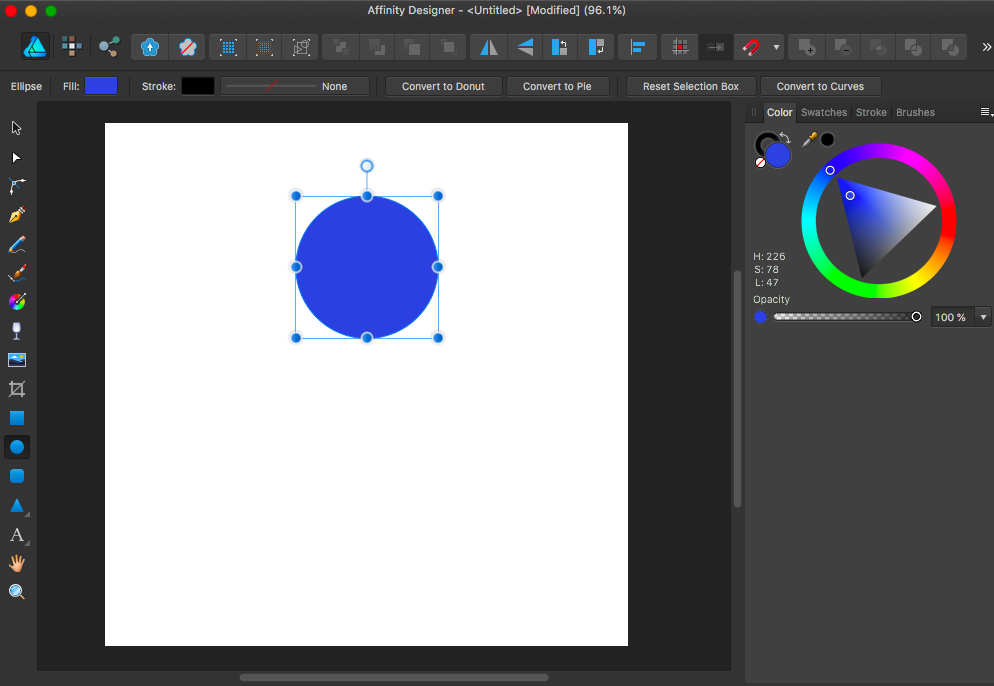
4. Now in your workspace use the circle tool to draw a circle high on the page.
5. Export an image of your document as a .jpg file by selecting "Export" from the "File" menu.
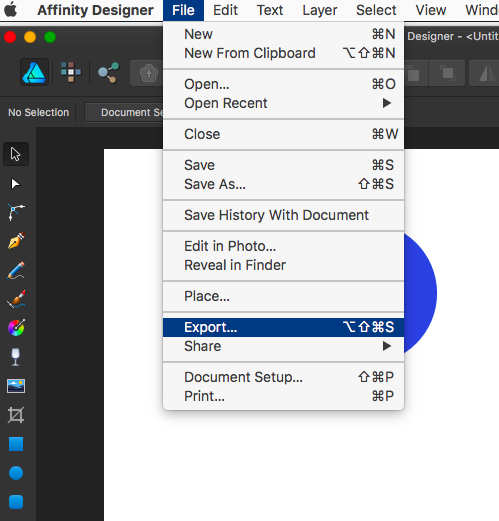
6. Select the "Jpg" tab and knock the quality down to about 50% then click "Export".
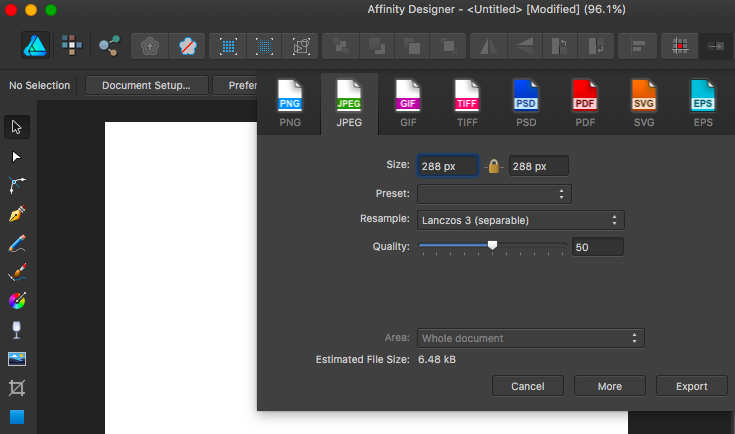
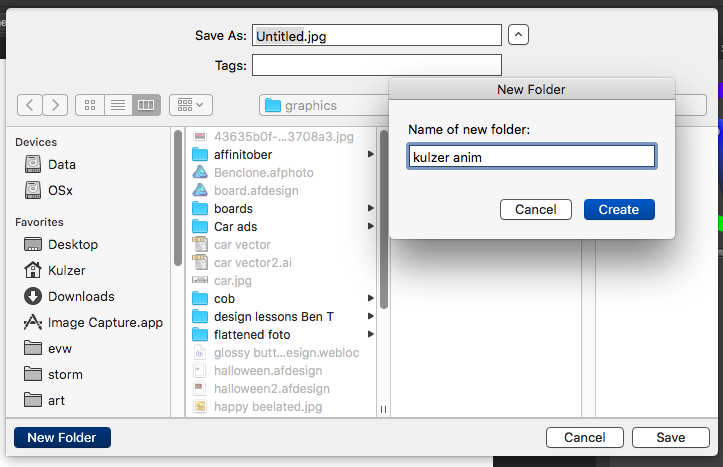
7. In the "Save As" dialog box that comes up, Click "New Folder" and title it with your name. Then title the image (Where my screen shot says, "untitled") as "01.jpg" and hit "Save".
8. Click on the ball with the move tool and hold the shift key down while you drag the cursor and ball downward. This constrains the motion to be straight down.

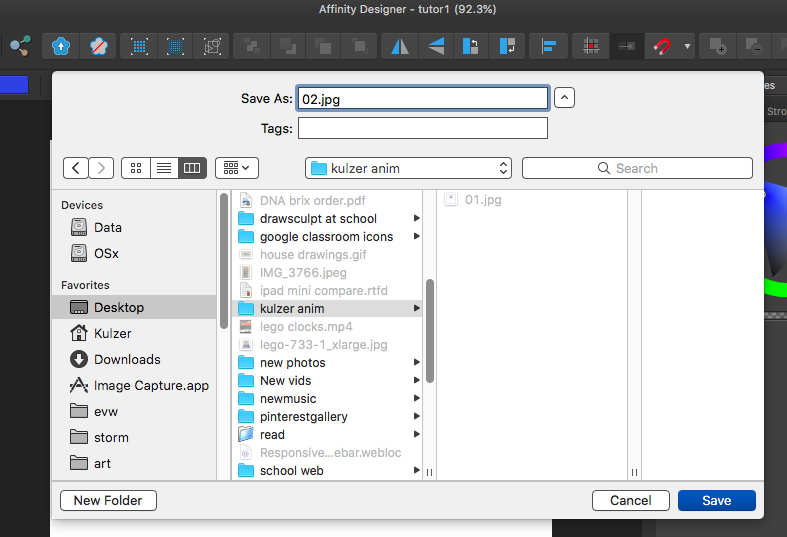
9. Export an image of your document again as we did in step 5, "File > Export". Be sure "Jpg" is still selected and click export. Save the image as "02.jpg". It will be saved in the same file you created in step 7.
10. Repeat steps 8 and 9 (adding some squash and stretch to the ball) until you have a cycle of images that can repeat.
Next, use this tutorial to load your images into quicktime and see them move.
Or if you're making an animated GIF, load your images to EZ Gif to create an animated GIF.
Back to top