Video version of these instructions can be found
here.
.
1. Take a series of pictures that show some sort of motion
2. Resize them to no larger than 6 inches
3. Use photoshop in some way to
add or
take away something in each photo
4. Save the images into a
folder
5. Make a new photoshop file the size of your saved images.
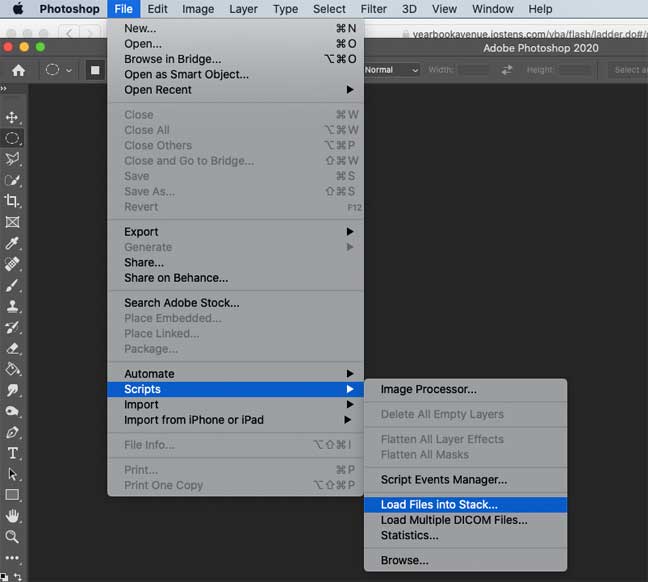
6. Open the images in photoshop by clicking, "File", then selecting "Scripts" and moving to "Load Files into Stack".
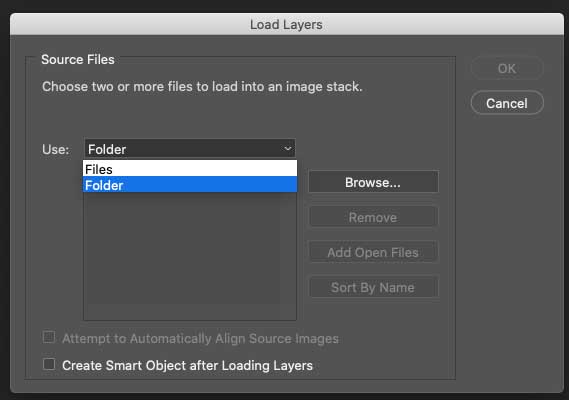
7. In the dialog box that comes up, select "folder"
then click "Browse" and navigate to the folder where you saved your images.
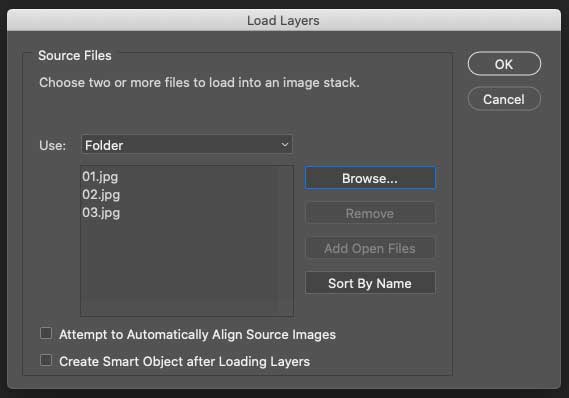
8. Hit "okay" and wait while Photoshop opens your images into separate layers.
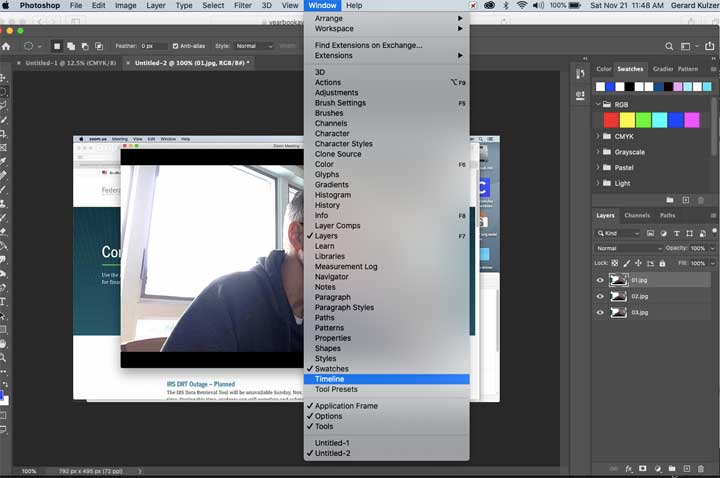
9. Click "Window" and select "Timeline" to make the "Animation Timeline" appear at the bottom of your screen.
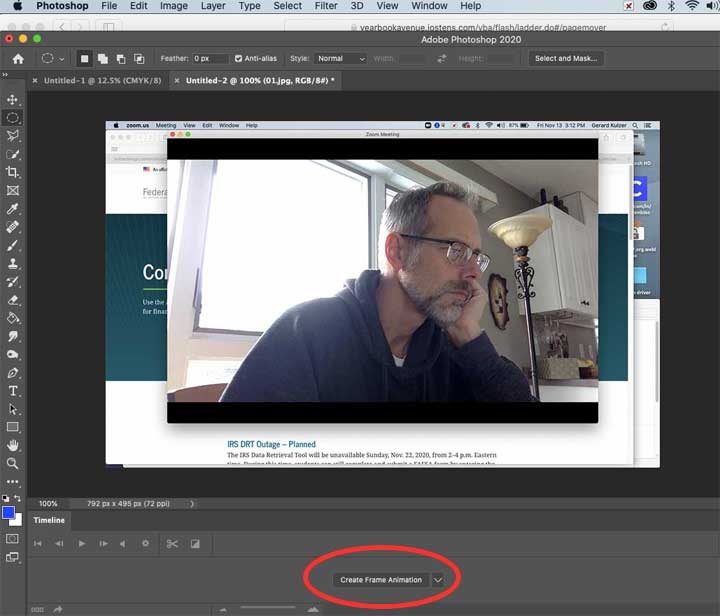
10. Click the little "Create Frame Animation" box on the timeline to place the first layer on your timeline.
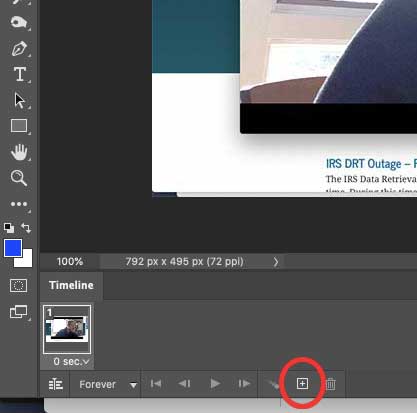
11. Click the + icon to duplicate the existing frame on the timeline.
12. Click the "visibility" eye icon in the layers palette to make the first layer invisible and reveal the second layer.
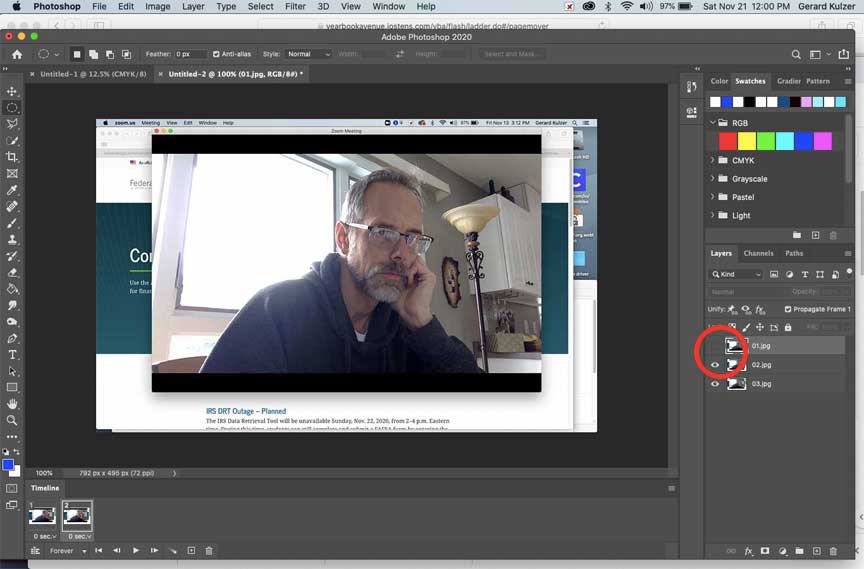
13. Repeat steps 11 and 12 as many times as necessary for each layer to be revealed.
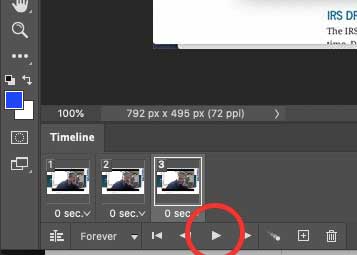
14. Click the pay button on the timeline to play through your animation.
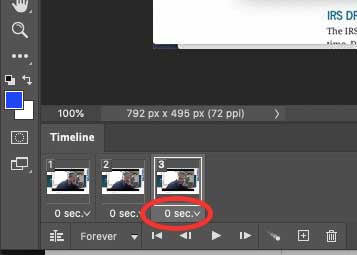
15. Set the duration of each frame accordingly.
16. Tweak the animation as needed by rearranging/repeating frames or adjusting the timing.
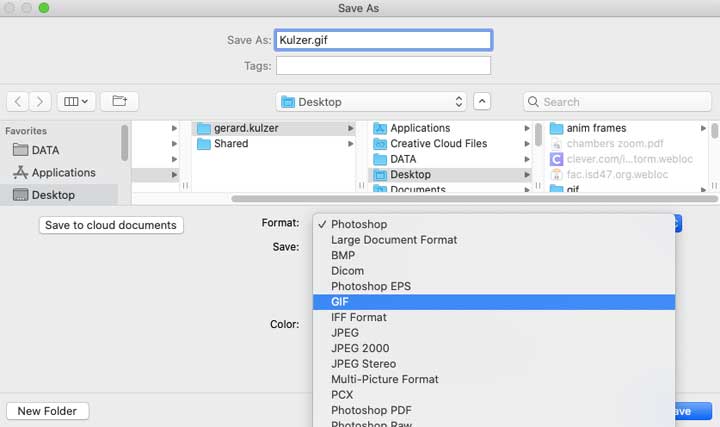
17. Always save your original file in Photoshop format so you can edit it later. Then, to save your animation as a gif, select "Save as.." under the "File" menu.
18. Save your animation with your name and be sure to select "GIF" from the "Format" box.
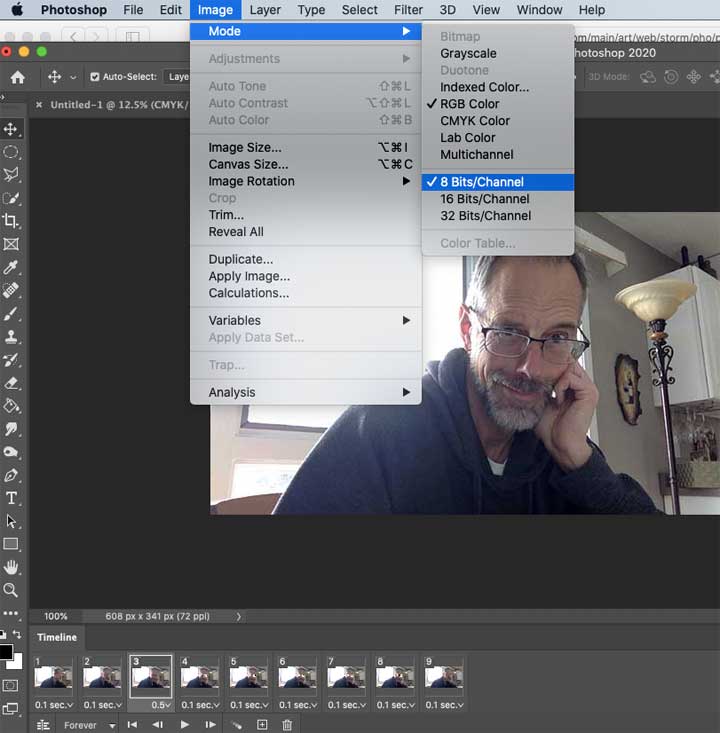
19. IF "GIF" isn't available in the "Save As" dialog box above, change the image mode to RGB and 8 bits/Channel as shown in the image below.
20. Be sure to turn in the .gif file, NOT the photoshop file.
Back to Top
