First, students are taken on a 2-3 day tour of the Adobe Photoshop interface and selection tools. Students follow along using the tools as the instructor shows them how each works.
For students who are absent, a set of video tutorials is provided below.
(Scroll down)
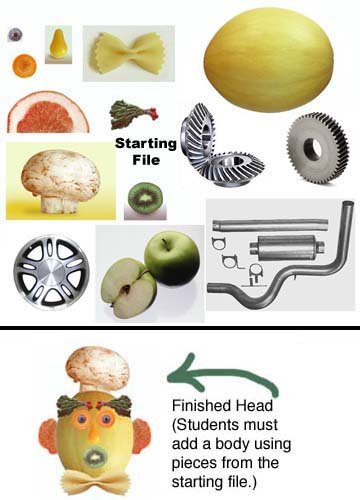
The first assignment is meant to give students experience using the Photoshop's selection tools. Many of the edits we use in this class involve accurate selections so it's vital that students understand how to select items accurately.
Students can
download a start file here. Drag it to the desktop and then drag it into the same file where they are saving all their work. After that, open the file in Photoshop by dragging it onto the Photoshop icon in the dock or by using the "File"--"Open" command in the Menu bar of Photoshop.
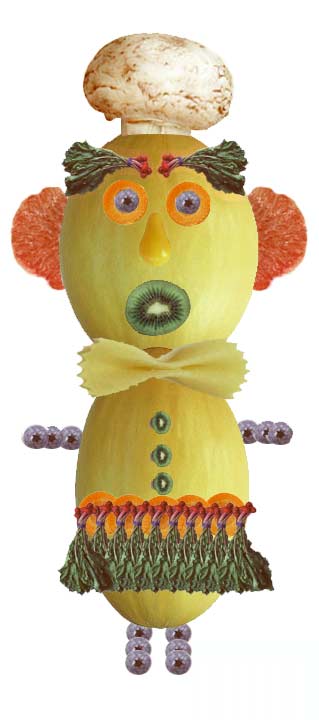
Students are to use pieces from the start file to accurately duplicate the finished Potato/Melon head face. Then they should use the given pieces in creative ways to make a body for Mr. Mellonhead. (See example below)
Evaluation:
2 points -- Accurate head
4 points -- Accurate selections
4 points -- Finished body
10 points total

